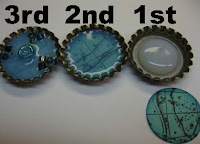
 Now onto Step TWO of the instructions for creating the Flair, see past two days for step one and supply list.
Step TWO:
1. Punch out circles of cardstock and rubberstamp an image onto it.
2. Ink edges of circles.
 3. Pour a dollop of Glossy Accents (GA) into a bottle cap.
4. Insert circlular disc into the bottle cap in the glossy accents, and push down. The GA will come up over the disc, add more GA to cover the disc.
5. Add a large center bead with the hole facing up.
6. Add smaller beads in various spots around the outer edge of the
 bottle cap. Let the all dry. It will probably take overnight.
Step THREE will post tomorrow....
Thanks for stopping by...DebDuzScrappin'
No comments:
Post a Comment