Showing posts with label Kids. Show all posts

Thursday, June 13, 2013

Minecraft cake!


Don't think I ever posted the photos of the Minecraft cake I made my kiddo for his birthday - He said it was his BEST CAKE EVER - that is a pretty cool thing to hear from the kid!  All his friends were more than impressed.  They inhaled the cake too!

I used a white cake mix, prepared as package directed.  Split into two bowls, colored one yellow, and one blue.  Poured into loaf pans and cook as directed.  I then make a carrot cake.  Once all the cakes were cooked, and cooled, I then trimmed them down and cut them into squares/cubes.  The blue cubes were water, the yellow sand, and the carrot dirt.  On the dirt, I piped green (cream cheese) frosting for "grass".  I have posted a before and after pic.  I then went online and found a bunch of different print outs for making 3D paper characters.  Which I printed, cut out, folded and glued and then added to the cake for decorations along with the candles.

The majority of the materials used in this project are from ClubScrap. TFL DebDuzScrappin

Thursday, March 7, 2013

Gift - Minecraft Sword

Minecraft Fans check it out....

My kiddo was beyond thrilled with this 'sword' we made for him for his birthday.  Now my youngest, who helped me make it, wants us to make him one too.  But of course, so we can have dueling swords in the house!

Supplies:
Foam core board
pencil
ruler
Paint (5 colors - 3 shades of blues, 1 brown, 1 white)

I printed out a photo of the minecraft sword and just counted the number of pixels and recreated it using 1 inch square for each pixel.  So the total length is 16, and at the widest part is 8 pixels.

1.  I marked up the foam core board with pencil and ruler at 1 in increments up and down and across.  Then I started marking squares so I would know which color goes in what square and used and exacto knife to cut the sword out. 

2. I repeated the pencil markings on the back side, since I needed to paint both sides.

3.  Then you can paint.  We started at one end and used a heat gun (carefully) to hurry up the drying process.


The majority of the materials used in this project are from ClubScrap. TFL DebDuzScrappin

Saturday, December 24, 2011

Loopy Christmas Ornament

Here is a pretty simple ornament that the boys and I made up this year. I used some red patterned and green patterned papers from previous years retreat kits from ClubScrap.

Very simple project but be sure and have some paper clips handy to hold pieces together while the glue is drying.

Instructions:
Cut green pieces 5.5 in long and 1 inch wide. Red ones can be shorter, like maybe 4 inches. This doesn't have to be precise. Our ornament turned out fairly large, so if you want it smaller, cut your pieces shorter.

Fold a loop into each of the green pieces and adhere the two ends together. Now you could use roller
adhesive if you like, but i wanted to ensure it didn't fall apart in storage, so I used liquid adhesive for mine. In my case I used small clips to hold them together while drying.

Once you have all the green ones folded and adhered, and dried - then fold the red ones, put adhesive on both sides of the ends of both red flaps and adhere in between two green ones, again hold with a clip. Once those - sets of green/red/green dry - adhere all the sets together.
You can add an additional extra long folded piece for the 'hanger'. I cut mine about 8 inches long and 1/2in wide. I then cut and matted a circular photo in the center of the ornament.


The majority of the materials used in this project are from ClubScrap. TFL DebDuzScrappin

Saturday, June 18, 2011

My new toy - Cricut!!

My boys love my new cricut!!

The majority of the materials used in this project are from ClubScrap. TFL DebDuzScrappin

Thursday, June 9, 2011

Project - Teacher appreciation gift

This is my old standby teacher's gift - the teachers seem to really enjoy receiving this one. They all love seeing the smiling little faces as little charms on this bracelet.

Instructions are posted HERE


The majority of the materials used in this project are from ClubScrap. TFL DebDuzScrappin

Saturday, May 28, 2011

Kids - mini pizzas

Nummy mini pizzas using pop-open biscuits pressed into muffin tins. Added sauce and pizza toppings. Kids luved the little personal pizzas.


The majority of the materials used in this project are from ClubScrap. TFL DebDuzScrappin

Tuesday, April 19, 2011

Project - Baby Album

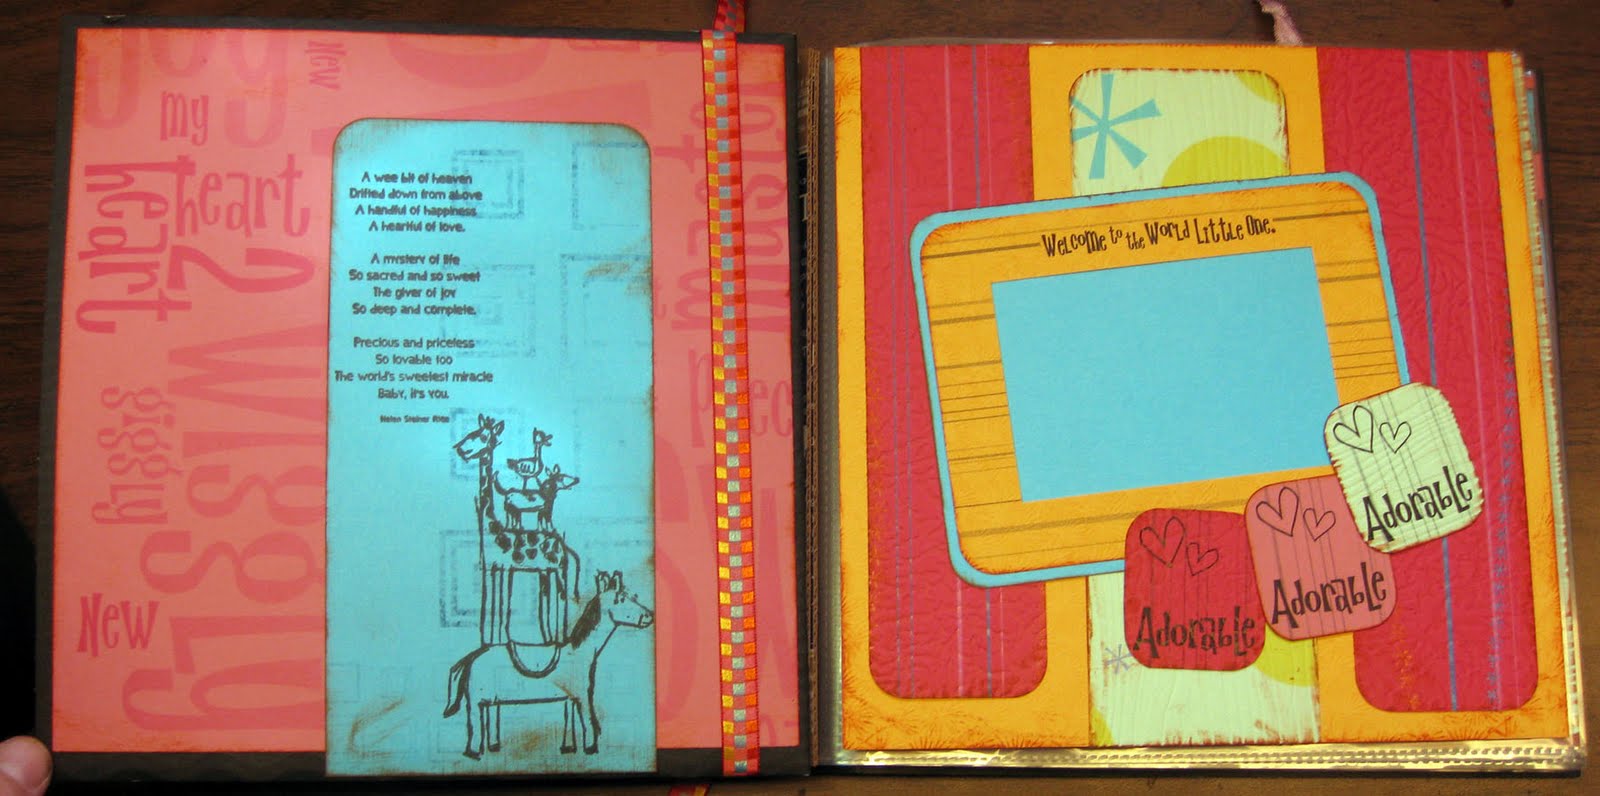
Ok - another baby gift for another friend of the family. This is a quick little 8x8 album. I was rummaging through my stuff and found a baby kit from ClubScrap that I bought a few years ago - the Oh Baby kit, if I recall correctly. I made the album cover out of some corrugated 8.5 x 11 cardstock, it is white on one side, black on the other. I just inked up the front to match the papers and covered the black side up with patterned papers. I just punched holes into the corrugated paper to match the page protectors and tied ribbons through the whole batch of them to create the binding. The kit had a bunch of cut-outs with sayings and sentiments.


The majority of the materials used in this project are from ClubScrap. TFL DebDuzScrappin

Monday, April 18, 2011

Project - Baby Gifts (Plate, piggy bank)

Well I can't figure out who posted this SVG file for the onesie, but I had some issues with it, I just couldn't get the collar to cut out, it was just too skinny and wouldn't stay in one piece. I will probably hunt up a new SVG next go around or make something new up...but I was wanting to try out my cricut and make a card to go with my baby gift. I used the stamped sentiment from ClubScrap's Oh Boy kit on the front.

The baseball piggy bank is just a little something I picked up and then cut out vinyl letters of the lil guy's name and placed it on both sides of the bank as part of his gift.

The plate is just a $4 plate from Walmart. I cut out the name and details all in black vinyl using my cricut and downloaded the baby image off of google images and did a trace image on it - cut the baby out of blue vinyl.

I am also including the plate holder with the gift. I hope they like it.

TFL DebDuzScrappin

Sunday, April 10, 2011

Project - Easter Bunny box

Well I got me a new cricut to play with...and this is my first paper related project. We like to make little gifts for some of the elderly folks in our neighborhood and this is what I came up with...

Mind you this is first stab at creating something like this - with layers and various colors of paper, it isn't perfect, but not too bad. Anyways I created this little box with a bunny. We put easter grass and little reese peanut butter eggs inside. Click here to get the SVG file.

Please leave a note if you download and like this...thanks


TFL DebDuzScrappin

Wednesday, March 30, 2011

Project - Cupcake boxes (kids' birthday)

Well my kiddo wanted to have his birthday party at "The Zone" and he only wanted 3 friends to join him. When I asked about whether or not I could bring in cupcakes - didn't figure I needed a whole cake for 5 kids - they said NO due to some law...so I decided to make the cupcakes and send them home with the kids in their goodie bags, so they weren't *eating* them at the facility. So I found a pattern for a box at donteatthepaste.com site. Their pattern was for printing out, cut and fold, but I wanted my own patterned paper (from ClubScrap Matrix kit) - I cut a hole in the top of each box and glued in some acetate, so that you could 'see' the cupcake in there. I think they turned out pretty nice.


The majority of the materials used in this project are from ClubScrap. TFL DebDuzScrappin

Wednesday, March 9, 2011

Misc - Kids dressed as Genghis Khan

So our favorite place to eat, HuHot - had a "dress like Genghis Khan" promotion. If you wore 3 articles of clothes like Genghis - you got your meal free. So the kids opted to dress up. I made part of their outfits using some of my metallic scrapbook papers. I made their cute lil gold hats and their silver belt buckles out of scrapbook papers!!

TFL DebDuzScrappin

Monday, March 7, 2011

Kids - Party Invites (Bowling Party)

"Bowling" party invites!!

The majority of the materials used in this project are from ClubScrap. TFL DebDuzScrappin

Friday, February 11, 2011

Project - "IPOD" Valentine's day gift exchange

Ok so this is what we settled on for the boys to give to their classmates this Valentine's day. We got 'sweet hearts' and wrapped them in various shades of colors (I used all sorts of pieces of card stock from my Pounds of Paper packs from ClubScrap for this).

Supplies needed:
Cardstock
String
Candy (rolos, mini reeses, hershey kisses)
aluminum foil
printed front pieces

optional
Clear plastic bags

Instructions:

1. Start by cutting approx 12 in pieces of sting for the ear buds and adhere to the box at one end.

2. Then wrap your box with the cardstock.

3. I printed out the template for the front of the ipod from here. Trim out the pieces and adhere to the front of the cardstock.

4. Cut a circular piece of aluminum foil about 3 inches wide, place the piece of candy (can be mini reese peanut butter cup, candy kiss, or rolo) and the end of the ear bud string in the center and wrap. This will hold the candy onto the string creating the illusion of an earbud. Repeat for other one.

I picked up some packs of clear plastic valentine's bags from the $1 spot at Target (20 bags per pack). I put the ipod and earbuds in the bag, rolled over the top edge and stapled a folded piece of cardstock at the top. I then printed out a "Because you rock..." sentiment and added to label. Also found a nice heart shape made out of little IPOD photos for putting on the label. I figured if I left them all in one big bag - they were going to be a tangled mess by the time the kiddos handed them out, so putting them into individual bags is a nicer option for us.

Now we have one kiddo in one of the kids' class that is allergic to peanuts - so instead of sweet hearts - we did a huge box of skittles (movie theatre size), wrapped it just like the rest (just lots larger), and instead of reeses for the ear buds - we used heart shaped erasers.

Ok well there you have it. Thanks for stopping by.


The majority of the materials used in this project are from ClubScrap. TFL DebDuzScrappin

LinkWithin

Related Posts Widget for Blogs by LinkWithin