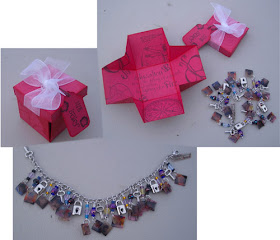
 Supplies:
Shrink plastic (make sure you get the kind that is correct for your printer): Club Scrap
Photo Editing software (Adobe Photoshop Elements is what I use)
Hole punch
Beads: Club Scrap
Charms
Jump rings: Club Scrap
Headpins: Club Scrap
Jewelry tools: Club Scrap
Bracelet blank and/or Large safety pin without the coil (both available at Joann Fabrics or Walmart)
Instructions:
1. I determined the number of photos I wanted on the bracelet/brooch. I resized each photo in my Photoshop Elements program down to 1 inch by 1 inch. I put all the photos onto one image, so I could print them all at the same time onto one sheet of shrink wrap.
2. When it comes to printing these images, do note that when the images shrink, they will darken up some, so when you print, you can go into your printer options and reduce the amount of ink that will be used. You can also chose the 'transparency' option, so that it travels a bit slower through your machine, allowing it to dry.
3. Once they are printed, let them dry completely.
4. Once dry, trim out the photos.
5. Punch a hole now BEFORE shrinking. I used a quarter inch hole punch.
6. Once they are punched, place them on a non-stick surface an put into your oven following the instructions on the package of shrink plastic. You can use your heat gun too if you prefer. You may need to use a hard surface (I use a wood block or the back of a wood rubberstamp) while the shrink plastic is still warm, to flatten the images, if they want to stay curled somewhat.
7. Once shrunk, you can add your jump ring and attach to your bracelet/brooch. I used a head pin and added various beads, than the photos.
8. I also added charms intermittently between the photos and beads.
Good luck and have fun!!
Debbie Weller
DebDuzScrappin.com
No comments:
Post a Comment