Sunday, May 31, 2009

Cruise Projects

I thought I would share a few of the projects we made on our cruise. ClubScrap comes up with the greatest projects and teaches you very 'out of the box' type projects, always seems like they are on the leading edge of new techniques and project ideas...

This particular project is a fold box. When the box opens there is 3 drawers...it is a very snazzy project. Very fun and unique.

Thanks for looking. DebDuzScrappin

Saturday, May 30, 2009

Added pics and journaling


I added some photos and journaling to the quickdrop layout I posted yesterday!! I do like quickdrops - they are so fast to use!!

Friday, May 29, 2009

Joined a SWAP...


Boy life has just been so busy lately and I have been dying to join the ClubScrap digital layout swap that has been going on monthly...but finally I had a few minutes (just before the deadline no less) to get a layout together for the swap this month...I am hoping to join every month from now on - assuming life permits!!

Thursday, May 21, 2009

Cards - Henna Kit

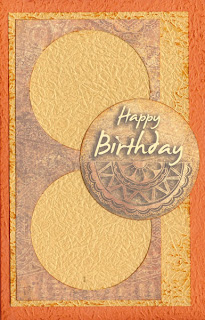
Club Scrap asked me to do up the batch of Greetings to Go cards for this months' HENNA kit...here are a few of them...

Wednesday, May 20, 2009

Another one...


Here is another fun one!!

Doesn't take much to catch my interest huh??

Tuesday, May 19, 2009

Isn't this just the cutest??


I love all the carved fruits and fruit displays on the ship - this one I knew would be a favorite of my son's - whom loves monkeys... The crew on that ship were amazing and so creative, just blows my mind, how fun to spend your time carving fruit and ice and folding cute animal towels!!!

Monday, May 18, 2009

Project - Valet Project

This is another great project from ClubScrap!! There is all sorts of little boxes and a flip scrapbook and I created some little mini albums to go in the little boxes. You could store little trinkets or memorabilia...very sweet gift idea too!!


Sunday, May 17, 2009

Mickey cup cakes

Here's the fun lil cupcakes I sent to school - I did the rainbow colored cake mix in each one and after frosting I put lil 'mickey' sprinkles and the cupcake 'ring' on each one.

They were a big hit, the kids at school loved them!!

Deb

Saturday, May 16, 2009

I think I am ready....Mickey Birthday


Welp I been running like a monkey to get the house fairly clean, decorated, and ready for my youngest boys' birthday party today!!

He chose Mickey mouse since there will be a 'girl' at his party and didn't want to have a fully boy themed party - what a sweetie huh? Sounds like it will be a fairly quiet affair...one of the boys' can't make it, another didn't RSVP (so who knows if he will show or not), so that leaves us with only 2 guests at this point. But it is a all day/night party - the girl won't spend the night but the one boy might assuming he is up for it...

I put together a small scavenger hunt, a couple other fairly lame games - not too creative in that arena...the table is decorated. The cake turned out pretty cute. The cake is carrot - my family is big on carrot cake - at least if you are going to eat cake - you get a few veggies in there, right???

I ran errands all morning to get ready for next weekend and hit a few yard sales, picked up a couple of books and miscellaneous stuff I probably don't really *need*...

Here is the cake pics!

Thursday, May 14, 2009

Cards - Two Tone Abstract

Here is a variation on the abstract - but I just did two colors of sharpies instead of the 8 colors.

Thanks for looking.

DebDuzScrappin'

Wednesday, May 13, 2009

Cards - Abstract Art inspired

This is a fairly simple technique.

Supplies
*Rubberstamps
*Black ink
*Sharpies
*Cardstock

1. Stamp a large focal image on white cardstock.

2. Use a ruler and draw one line up and down, and one line left and right, in order to divide the image into 4 sections.

3. Choose 8 colors of sharpies and color the partial image within one section one color, and the area around that image section another color. Repeat for all sections.

4 Mat onto cardstock and card back.

Thanks for looking.

DebDuzScrappin'


Monday, May 11, 2009

Cards - Piet Mondrian - Variation Red, Blue, Yellow


So on these samples, instead of drawing my lines completely to the end of the paper, I varied the length of the lines - I think this is a very nice variation on it.

Sunday, May 10, 2009

Cards - Piet Mondrian - More variations

Here are a few more card samples using varations on the Piet Mondrian theme.

This technique has so many variations and possibilities to experiment with!!

Thanks for looking.

DebDuzScrappin'


Saturday, May 9, 2009

Cards - Piet Mondrian - Within an Image

Ok another set of cards, still going with the Piet Mondrian theme and style, but just doing it within a stamped image rather than the entire card front.

DebDuzScrappin

Friday, May 8, 2009

Thursday, May 7, 2009

Cards: Piet Mondrian Inspired

Here is the list of supplies needed:

¨ White Cardstock

¨ Rubberstamps

¨ Black ink pad

¨ Sharpie pens

¨ Ruler

The same basic steps are taken for each of the cards in this batch of examples:

1. Rubberstamp your main image onto the card front in black ink.

2. Using ruler and black Sharpie pen, draw a grid of lines as shown.

3. If desired, rubberstamp additional images into some of the other boxes.

4. Color 1 box yellow, 1 box red, and 1 box blue.

5. Adhere the card front to the card back.

“Today is your Lucky Day” card

Cut a piece of black cardstock 5.5in x 8.5, fold in half for card back. Cut a piece of white cardstock 4x5.25 in. Rubberstamp “Today is…” Sentiment (ClubScrap) in black ink. Use ruler and black sharpie to create grid. Rubberstamp “Starburst Trio” image (ClubScrap) with black ink in some of the other boxes as shown. Color in 3 of the boxes with red, blue, yellow as shown. Adhere card front to card back. Finished card measures 5.5in x 4.25in.

“Ferns” card

Cut a piece of black cardstock 5.5in x 8.5, fold in half for card back. Cut a piece of white cardstock 4x5.25 in. Rubberstamp “Happy birthday…” Sentiment (ClubScrap) and the (2) different “ferns” images (ClubScrap) in black ink. Use ruler and black sharpie to create grid. Color in 3 of the boxes with red, blue, yellow as shown. Adhere card front to card back. Finished card measures 5.5in x 4.25in.

“Look what I dug up” card

Cut a piece of black cardstock 5.5in x 8.5, fold in half for card back. Cut a piece of white cardstock 4x5.25 in. Rubberstamp “Look what I …” Sentiment (ClubScrap) and “Magnifying glass” image (ClubScrap) in black ink. Use ruler and black sharpie to create grid. Rubberstamp “I discovered…” sentiment (ClubScrap) with black ink in one of the other boxes as shown. Color in 3 of the boxes with red, blue, yellow as shown. Adhere card front to card back. Finished card measures 5.5in x 4.25in.

“What a day” card

Cut a piece of black cardstock 5.5in x 8.5, fold in half for card back. Cut a piece of white cardstock 4x5.25 in. Rubberstamp “Happy Birthday…” Sentiment (ClubScrap) and “Vase collage” image (ClubScrap) in black ink. Use ruler and black sharpie to create grid. Rubberstamp “What a day” sentiment (ClubScrap) with black ink in one of the other boxes as shown. Color in 4 of the boxes with red, blue, yellow as shown. Adhere card front to card back. Finished card measures 5.5in x 4.25in.

“I appreciate you” card

Cut a piece of black cardstock 5.5in x 8.5, fold in half for card back. Cut a piece of white cardstock 4x5.25 in. Rubberstamp “I appreciate you…” Sentiment (ClubScrap) and “Flowers in vase” image (ClubScrap) in black ink. Use ruler and black sharpie to create grid. Rubberstamp “Fleur” image (ClubScrap) with black ink in one of the other boxes as shown. Color in 6 of the boxes with red, blue, yellow as shown. Adhere card front to card back. Finished card measures 5.5in x 4.25in.

LinkWithin

Related Posts Widget for Blogs by LinkWithin